Tuesday, September 1, 2009

Wedding Cake Wednesday: A Modern Cake, a Beautiful Couple


I did this cake a couple weeks ago for a friend of a friend. It was so fun to make! I just love the sleek look of it. Because the wedding was a large one, this cake required supplemental sheet cakes in order to feed everyone. I made two huge sheet cakes and a small gluten-free cake to round out the selection.


Details on the cakes:

Bottom tier: Tiramisu (vanilla/almond cake, espresso syrup, mascarpone mousse, chocolate shavings) -- I know it's a stretch to call it tiramisu when there are no ladyfingers or cocoa powder, but it's a delicious adaptation that lends itself well to wedding cakes.

Middle tier: Lemon poppy seed.

Top tier: Tiramisu.

Outside: Buttercream. (I'm so glad I used high-ratio shortening for this -- it was an outdoor wedding, and although the weather was supposed to be fairly cool that day, it turned out to be hot. Butter/regular shortening + hot weather = melting cake.)

Decorations: Beautiful grosgrain ribbon (pink) and flat ribbon (orange). I love this color combination! Major props to the bride for the excellent choice of color and spacing. Cake topper and additional fresh flowers were provided when I got to the venue. So pretty.


Supplemental sheet cake 1: Chocolate raspberry.

Supplemental sheet cake 2: Tiramisu.

Gluten-free cake: Lemon poppy seed.


Interesting tidbit about the sheet cakes:
My oven at home isn't large enough to accommodate the large pans required for the sheet cakes, so, about a week before the wedding, I did a couple of baking sessions at my friend Teri's house.

The first session went well. The spacious oven worked out great and baked true to temperature; I got three cakes done easily in under 4 hours.

The second session also went great. The trip home, however, did not. See, there's a certain art to transporting cakes. For some reason (crack smoking, maybe?), I thought it would be a great idea to place my KitchenAid right next to one of the sheet cakes in my trunk....

Everything was going fine until I hit the first stop sign on the way home. I heard a loud "thud." My heart sank; there was no doubt in my mind what had happened. This is what it looked like when I opened the trunk:


Holly embraces her fail!

Lesson learned: KitchenAids like to tip over! Fortunately, I had the time, ingredients, and energy to turn right around and bake another one that night. It was a long night, but it could have been a lot worse. This is why you plan ahead and bake your layers in advance!

Special thanks to Teri for letting me take over her kitchen for the extended baking sessions. I salvaged the large, unsmashed pieces and gave them to Teri to share with anyone who had a hankering for cake -- BYOF, of course (bring your own frosting). I heard the leftovers from this cake lasted for days and days.

Wednesday, April 15, 2009

Experiment of the Week -- Cactus Cornbread


I've waited 13 years to make these!

The first time I tried them, I was a freshman in college. It was green chile and cheddar cornbread, and it changed my life. I've had a lot of cornbread since then, but nothing could compare. I don't know why, but for some reason it just tastes better when it's in the shape of a cactus.

I held off on buying the cast iron cactus pan for years -- I thought it was just too frivolous. Six months ago, I came really close to buying one when Geoff and I were on our road trip, but I chickened out.

So a few days ago, Geoff got a couple of packages from Amazon. He said that one of them was for me. I opened it, and to my surprise, it was the cactus pan of my dreams. GREATEST SURPRISE EVER! Check it out:


This has got to be the coolest piece of bakeware that I own! It even came pre-seasoned, which made it even more magical.

The cacti in the picture at the top of this post were made with plain cornbread batter. For the ones pictured below, I added green chile powder and cheddar cheese, just like the ones in 1996.


I will be making these often.

Sunday, April 12, 2009

Lemon-Raspberry Cake


This cake always reminds me of Spring.

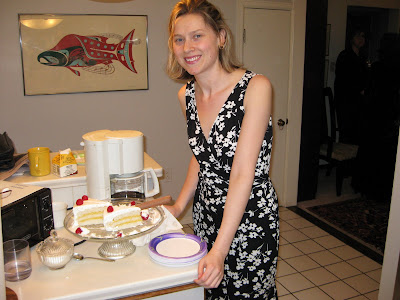
I made it while up in Seattle this weekend. We had a lovely Easter brunch at my mom's, followed by a wonderful piano concert at my dad's. I made this cake for the reception. My dad took this picture as we were setting out the slices for everyone:


You can see the layers of lemon curd between the white cake layers. For the frosting, I used freshly whipped cream with some vanilla and sugar, and then I garnished the whole thing with raspberries.

There's really not that much to this cake, but people love it. It's simple and it tastes really good!

Saturday, April 11, 2009

The iCake


Geoff turned 30 last November!

To celebrate, I made a cake that paid tribute to his favorite gadget: the iPhone. This phone is awesome. It does everything! Well, maybe everything except for turning itself into dessert for a dozen of your closest friends. (Please tell me there's not an app for that.)

The iCake took 2 days to make. This is not counting the time I spent researching what an iPhone looks like. Oh yeah, it should be noted that I was doing all of this in secrecy, as I wanted it to be a surprise for Geoff.

How would I get a good look at his phone without him getting suspicious? I don't normally take an interest in things that are high-tech (in fact, I usually run the other way).

Ultimately I realized that Geoff and his iPhone were inseparable; I would have to accept this and find another strategy. Lucky for me, our roommate Khoi had just purchased his own iPhone. Once I was able to spend some time with his phone and the manual that came with it, I was in business.


If you have an iPhone, you may notice that the weather, date, and time are slightly different. This is because I wanted it to show what the conditions were like at the start of the epic 30th birthday party occurring that night.

I got a huge kick out of making this, if for no other reason than I got to go old-school, baking a cake in a 9 x 13 pan. Hadn't done that in a long time. I decided to use that particular pan because it has slightly rounded corners (just like an iPhone), which meant less work when it came time to decorate.

Details on the cake:

Inside: Carrot cake. I used the Joy of Cooking recipe. It was kind of disappointing to me, tasting a little too much like baking powder. (Didn't stop me from having 3 pieces....) I have a much better recipe from school.

Frosting: Basic chocolate buttercream. To get it that shade of black, I used 2 canisters of food-grade spray paint over the course of two days. Spray; dry; repeat. Gets a little darker with each application.

Icons: Fondant. These were a labor of love. It was kind of fun at the party, though. Everyone got to pick the icon they wanted for their slice. I was amazed that so many people actually had a preference.

Writing: Royal icing. I really should have thinned it out a little with corn syrup. This particular batch just did not want to be written with (usually my cake penmanship is much nicer).

Border: Foil, attached with frosting "glue."

Wednesday, April 8, 2009

Wedding Cake Wednesday -- A Cake for My Little Brother


Last August I had the honor of making this cake for my brother David's wedding.

(I only refer to him as my "little brother" because I'm slightly older than he is. I can't really call him little anymore; he hit a growth spurt as an adolescent and has towered over me ever since.)

I made this cake with extra love! It took several nights of making sugar flowers in front of the TV, but I was able to get them all done with plenty of time to spare. I should mention that I was also working on two other wedding cakes at the same time. It was crazy! But then again, I suppose that's why I call myself a crazy baker. Let's hear it for my mad time management skills.

Details on the cake...

Top and bottom tiers: Vanilla layers with raspberry jam filling.

Middle tier: Vanilla layers with caramel filling (VERY tasty).

Outside: Vanilla buttercream (which you can't see), covered in rolled fondant. Piped borders in royal icing.

Flowers: All handmade from gumpaste. I normally use fondant or a gumpaste/fondant combination for flowers, but I wanted to go all-out on this one. You can get the petals so incredibly thin and lifelike with gumpaste. I also used other touches to make the flowers more lifelike, namely Luster Dust and Petal Dust. (These are basically glorified versions of chalk that you can eat--not that I'd recommend eating these flowers. I'm just sayin' you could.)

Cake board: Standard wooden round from the cake shop, wrapped in foil for some nice cake bling.

Topper: Classic and beautiful. I actually didn't know what it would like until I showed up at the reception site. I love surprises!

Monday, April 6, 2009

Experiment of the Week -- Fortune Cookies


Last Sunday I tried out my first reader-suggested recipe: fortune cookies. They were fun, tasty, and relatively simple. Of course, I didn't start out making perfect fortune cookies. I found that preparing and baking the 4-inch rounds of tuile batter was easy. Pulling the cookies from the oven at just the right stage of doneness: also easy. Doing cookie origami for an entire sheet tray in under one minute: NOT easy (the first few times anyway).

Check out the fantastic fail:


(The fortune says "Please don't eat me. I love you.")

I just couldn't figure out how to fold them into the classic fortune cookie shape. Because I'm not gifted at spatial relationships or shapes, I turned to Geoff for help.

I'm sure that someday I'll write a book with a title that reads something like 100 Reasons It's Great to Live With Engineers. Reason #58: They save your ass when you can't figure out how to turn flat circles into fortune cookies! Anyway, once Geoff showed me the way, it was smooth sailing.

The secret is to fold each cookie up like a taco, place the fortune inside, and then fold it in a special way over a wooden spoon. It was also helpful to stick the finished cookies in a muffin tin to keep their shape as they cooled down and crisped up. The only thing I'd do differently next time would be to make a larger batch (this one made 14).

Sunday, April 5, 2009

Cupcakes


Yet another birthday!

I always like to celebrate a friend's birthday by baking something special. Usually it's a special cake, but I was really feeling some cake fatigue setting in with all the birthdays we've been having lately. Wanting to do something a little different, I decided last week to break the cake monotomy with some nice cupcakes.

(And yeah, I'm aware that cupcakes are not that different from cake. Still, they're different enough.)


They were as fun to make as they were to eat! I've always loved piping, and these little treats were just begging for some squiggles. And the best part is, I made these cupcakes gluten-free, so the birthday girl could actually eat them. Yum!

Thursday, April 2, 2009

Truffle Mania


(For a larger picture, click anywhere in this photo.)

I love making truffles!

Working with chocolate is the best. It's a great way to be artistic, express myself, and get a wicked sugar/caffeine buzz all at the same time.

I made the truffles pictured above about a year and a half ago. I had just started my confection business, Urban Chocolatier, and I thought it would be a good idea to have a roll-out party.

The flavors you see in the photo above are:

Lemon white chocolate/raspberry dark chocolate (the triangular ones)

Pistachio marzipan

Salted caramel milk chocolate

Chai milk chocolate

Ginger white chocolate

Rum balls.

Speaking of rum balls...


I had never really tried rum balls or bourbon balls until I was developing my product line and wanted to offer something with a lower price point. I figured, why not?

The picture above is a shot of some tempting rum balls I just made for fun one day.

Here are the rest of the truffles from the party:


Truffles in this shot (that weren't already listed above) include:

Coffee (the square ones with the dark chocolate bean on top)

Chocolate-dipped marzipan (the ones with the lines on top)

Peanut butter dark chocolate

Bailey's milk chocolate

Bourbon balls

Gianduja (hazelnut and milk chocolate).

Wednesday, April 1, 2009

Wedding Cake Wednesday -- My Very First Wedding Cake


I thought it would be fun to have a weekly post about the wedding cakes I'm working on. Before I get to my current ones, though, I will start where it all began: my very first. This was in the summer of 2004--before Le Cordon Bleu, before I knew how to frost a cake, before I dared to make a cake that wasn't from a mix.

This was definitely a "figure it out as you go" kind of deal. I will always be grateful to my cousin (the bride) for selecting a simple yet elegant cake for her wedding. Because, let's be honest, I love to make things more complicated than they are! I could have spent the entire summer figuring this out. It's really hard when you've never made a wedding cake before and you have no one you can talk to about the process.

Not surprisingly, I ended up staying up until the wee hours putting the finishing touches on it the night before the wedding. I also had my first attack of what I call "cake insomnia," which is what I've had with every single wedding cake since. Even when the cake is finished, I have trouble sleeping until I know that it's safe at the wedding site. They say that the more cakes you do, the less you stress about them, but I'm still waiting for this to happen....

Info on the cake:

Top and bottom tiers: Vanilla layers with raspberry buttercream filling

Middle tier: Vanilla layers with chocolate/hazelnut filling

Outside: Vanilla buttercream

Cake board: Custom-made just for this cake. I still use it for some of my other cakes.

Flowers: Lilies purchased from a Jo-Ann Fabric that was going out of business. Believe it or not, finding the perfect silk flowers was the hardest part of doing this cake. It took weeks. (I opted not to use fresh lilies, because I read somewhere that they have a very strong odor that can overwhelm the cake. And I was unaware at that point that the flowers could be made out of gumpaste.)

Loafin' Around


Most people who know me are aware that I'm addicted to olive bread. I can easily put away an entire loaf by myself. When I was a teenager, I would often go with my brother to Thriftway at 9:45 pm so we could catch the 50% off bread markdown that would occur every night at 10. Most of the time I was able to score a cheap loaf of some tasty olive bread. Exciting times, I know! What can I say? It kept me out of trouble.

However, now that I've figured out how to bake my own bread, I no longer feel the need to go on late-night artisan bread runs. I made the loaves pictured above using a recipe from the Panera cookbook. I made them a couple years ago and haven't made them since. They were too good! I'm the same way with chocolate-covered macadamia nuts. There is no self-control once the box is opened. So now I wait for really, really special occasions to make olive bread.

Sunday, March 29, 2009

Birthday Blowout!


(We are all 31 years old!)

A few weeks ago, Geoff and I hosted a massive birthday party. So massive, in fact, that I took the liberty of making two cakes. It was a great party. So many of our friends were having birthdays in the same one-month period that we decided to just celebrate them all on the same night.

The first cake (above) was huge! I had never made an ice cream cake before, and I wanted to make sure that there was enough for everyone. Turns out I had nothing to worry about; there was more than enough. I even brought the leftovers to a party a week later, and we couldn't finish. Rumor has it that our friends are still working on this cake, taking a piece from the freezer every now and then when the mood strikes.


This is a close-up of the "1" of the "31" cake. You can see the butter pecan ice cream sandwiched between the Texas sheet cake layers. I have to admit, at the outset I was really excited about trying out this particular sheet cake. However, now that I've made it a couple times, I'm so over it. It was very heavy, but not in a satisfying, "totally worth the calories" way. I think a better choice for the cake portion would have been either a lighter chocolate cake or just a straight-up brownie.

My favorite part of making this cake was frosting it in soft ice cream. You have to get the ice cream at just the right consistency where it's soft enough to spread but not so soft that it's runny. It was crazy! You really don't have a lot of time to get precious with it. I definitely felt the clock ticking.


This burger cake was a huge hit! My good friend Meghan was one of the birthday people, and she loves hamburgers more than anyone I've ever met. I knew what I had to do!


This was so much fun to make. I had seen a couple of these hamburger cakes online, and the idea was pretty easy to copy. I just baked a couple of 6-inch rounds in chocolate and vanilla. I used fresh fruit for the cheese, tomatoes, and pickles. For the lettuce, I tinted some coconut green. I used whipped cream for the mayo and Rice Krispies for the sesame seeds.

Saturday, March 21, 2009

Happy Birthday, Mike!


This week will mark the 28th birthday of my good friend Mike. Right now, he is obsessed with rock climbing, so I thought it would be fun to make a cake to follow that theme.


The foundation is just a basic white cake with chocolate buttercream. I made the mountain out of Rice Krispie treats and then covered it with some fondant that I had tinted grey. I also used fondant for the boulders, shrubs, and miniature person hanging on to the side of the mountain for dear life. For the gravel, I made a small batch of rock sugar.


This was a recipe I had made only once before (in pastry school), but I remember having a lot of fun with it. Basically, what you do is heat up sugar and water to 285 degrees Fahrenheit, then stir in a tablespoon of royal icing. When the mixture foams up like crazy, you pour it out. When it cools and dries, you are left with rock sugar.

In its original state, rock sugar is white. But since I wanted a more natural look to the candy gravel, I tinted half of it brown with some cocoa powder.

Welcome to Pastry Obsession!

Welcome to my blog, everyone. I'm excited to share my creations with you!